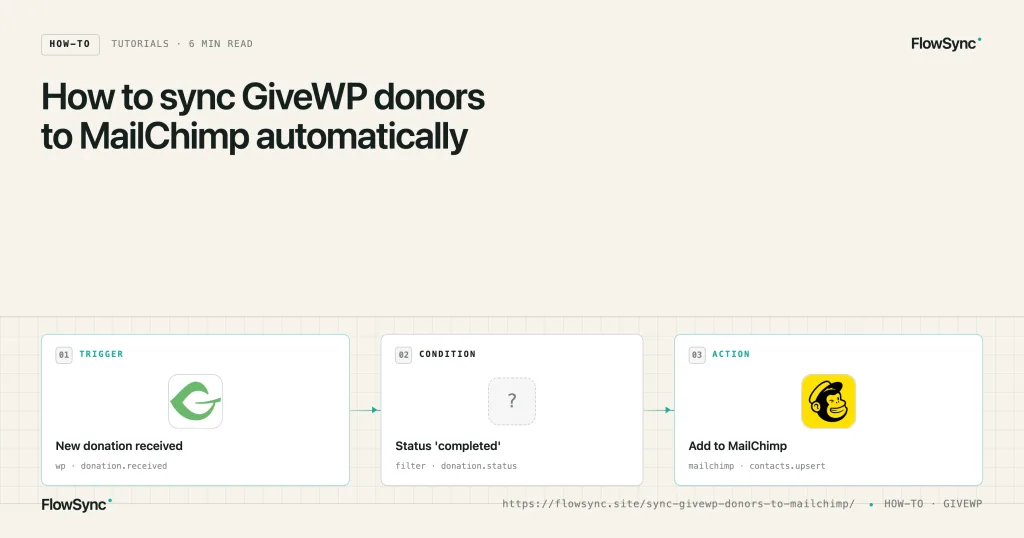
Someone donates through your GiveWP form. GiveWP records the donation, creates a donor record, and sends the receipt. Mailchimp, meanwhile, has no idea any of this happened. The two run side by side on the same site and never talk to each other, because nothing connects them by default. There is no bug here, and nothing is broken. WordPress and Mailchimp are just separate systems, and the wiring between them is missing.
For most nonprofits, that wiring gets done by hand. You export donors from GiveWP to a CSV every week or two, open Mailchimp, import the file, and hope you remembered to do it before the next appeal goes out. The list is stale the moment you export it. New donors sit outside your email tool until the next manual pass, and there is no easy way to tell a first-time $20 giver apart from someone who has given five times this year.
FlowSync closes that gap. It runs inside WordPress, watches GiveWP for donation events, and pushes the donor straight into a Mailchimp audience the moment the donation completes. No CSV, no middleware relay, no waiting for the next export.
What you’ll build
A workflow that adds every completed donor to a Mailchimp audience automatically, with their email and name, and tags them so you can target donors in your campaigns. By the end you’ll also know how to route larger gifts to a separate audience using a condition.
Before you start
- GiveWP is installed and taking donations
- A Mailchimp account with at least one audience created
- FlowSync is installed and active on your site
- Your Mailchimp API key (Mailchimp account > Account & billing > Extras > API keys)
Step 1: Connect Mailchimp to FlowSync
In your WordPress admin, go to FlowSync > Integrations, find Mailchimp, and paste in your API key. Save, then use Test connection to confirm it works.
For developers: Mailchimp keys carry the data-center suffix after the dash, like
xxxxxxxx-us21. FlowSync extractsus21and routes API calls tohttps://us21.api.mailchimp.com. Authentication is HTTP Basic with the key, not OAuth, so there’s no redirect flow to configure. The connection result is cached for five minutes; Test connection forces a live round-trip so you’re never looking at a stale status.
Step 2: Create the workflow
Go to FlowSync > Workflows and create a new workflow. A workflow is the full configuration: the event that starts it, any conditions that filter it, and the actions it runs.
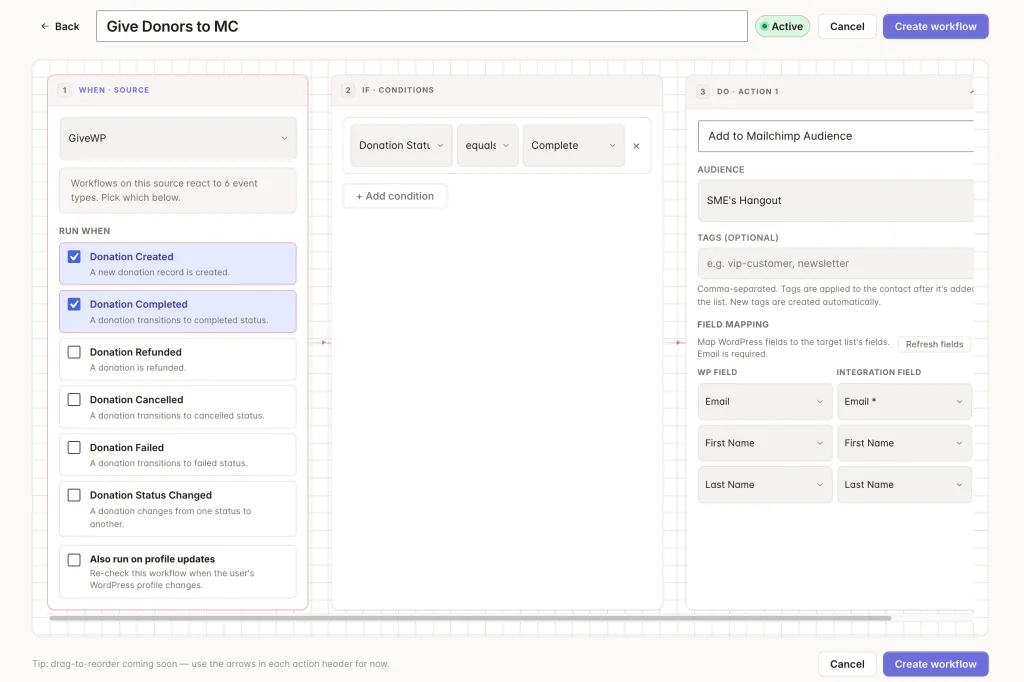
Set the source to GiveWP and the trigger to Donation Completed. This fires when a donation reaches completed status, so you’re only ever syncing people whose payment actually went through. GiveWP also exposes Donation Created, Refunded, Canceled, Failed, and Status Changed if you need them later, but Completed is the one you want for list building.
For developers: Donation Completed listens on
give_update_payment_statusat priority 9999, which lands aftergive_complete_purchase, so the payment status you read is the final one. Guest donations with no WordPress user are skipped, because the sync needs a real user to resolve fields against.
Step 3: Add the action
Add an action and choose Add to Mailchimp Audience (mailchimp_add_to_list). Pick the audience you want donors to land in from the dropdown. FlowSync loads your audiences directly from Mailchimp, so you select by name rather than pasting an ID.
The field mapping is pre-filled with the three things every list needs:
- Email Address maps to the donor’s email
FNAMEmaps to their first nameLNAMEmaps to their last name
That covers the free tier. Email and name are all Mailchimp needs to add someone and address them properly in a campaign.
For developers: the action sends a
PUTto/lists/{id}/members/{md5(lower(email))}, so it’s an upsert. A donor who already exists in the audience gets updated, not duplicated. New members are added assubscribedunless you’ve turned on double opt-in, in which case they come in aspendinguntil they confirm.
Step 4: Tag your donors
In the same action, add a tag so these contacts are identifiable in Mailchimp. Something like Donor works. FlowSync pulls your existing tags from the selected audience, and if you type a new one, it gets created on the contact.
Tags are how you’ll target donors in a campaign later without mixing them in with your general newsletter list.
Step 5: Activate and test
Save the workflow and switch it on. Then make a small test donation through one of your GiveWP forms using an email you control.
Within a few seconds, the contact should appear in your Mailchimp audience with the name filled in and the Donor tag attached. If you have Double Opt-In enabled in the Mailchimp integration, the contact will appear as pending until you click the confirmation link in the email.
For developers: CRM actions on automatic workflows run through the background queue via Action Scheduler, not inline with the donation request. A slow or briefly unreachable Mailchimp won’t hold up the donor’s checkout, and timeout-style failures retry once after a short backoff.
Real example: route major donors to their own audience
Adding everyone to one audience is the baseline. The more useful setup separates donors by size so your asks match the relationship.
Add a condition to the workflow: Donation Amount is greater than 100. Point the action at a separate audience, say “Major Donors,” or apply a Major donor tag instead of the general one. Now, a $250 gift gets handled differently from a $15 one, automatically, the moment it lands.
GiveWP also lets you use Donor Donation Count as a condition, so you can split first-time donors from repeat donors in the same way. Build one workflow for new donors with a welcome tag, another for returning donors, and your segments stay current without you touching a spreadsheet.
Free vs Pro
The walkthrough above runs entirely on the free version. Connecting Mailchimp, triggering on GiveWP events, filtering with conditions, adding donors to an audience, and tagging them are all free. Field mapping on the free tier covers email, first name, and last name.
Pro adds the donation data itself to the mapping. You can push the donation amount, the donor’s total given, their lifetime donation count, the donation form name, and the donation date into Mailchimp merge fields. Once those values live in Mailchimp, you can build segments and automations there around giving history, not just in WordPress.
Pro also adds manual bulk runs, which is how you handle the donors you already have. Point the workflow at your existing GiveWP donors and sync them across in batches, so you’re not starting your Mailchimp audience from zero on the day you install.
Common issues
The contact didn’t appear. Check that the workflow is enabled and that your test donation has reached completed status. A donation stuck in pending or processing won’t fire the Donation Completed trigger.
The name is blank in Mailchimp. GiveWP collects first and last names on the donation form, but only if those fields are enabled. If your form only asks for an email, there’s no name to map.
The donor shows as pending. That’s Double Opt-In doing its job. Mailchimp holds the contact as pending until they confirm by email. Turn it off in the Mailchimp integration settings if you’d rather add donors directly.
Guest donors aren’t syncing. Donations made without a WordPress user account are skipped because the sync resolves fields against a real user. If you want every donor synced, require account creation at checkout in GiveWP.
Next steps
Make a test donation and watch it land in Mailchimp before you trust it on live traffic. Once the basic sync is running, add the major-donor condition from the example above so your segments build themselves.
If you want donation amounts and giving history inside Mailchimp for deeper segmentation, that’s what the Pro field mapping covers. See the GiveWP integration page for the full list of donation and donor fields you can map.

FlowSync
FlowSync syncs members, customers, and form leads to Brevo, Mailchimp, HubSpot, Klaviyo, and more based on activity happening on your WordPress site.