
Running SuiteCRM on your own server and want WordPress to keep it populated automatically? This page covers how to connect FlowSync to a self-hosted SuiteCRM instance so your members, customers, and form leads sync directly into your Contacts and Leads.
SuiteCRM is self-hosted, so the connection works a little differently from a hosted service like HubSpot. There’s no central FlowSync login step. You create an OAuth2 client inside your own SuiteCRM, and FlowSync talks directly to your instance.
What you’ll need
- A running SuiteCRM instance you can reach over HTTPS, with a valid SSL certificate. FlowSync verifies the certificate, so a self-signed or expired one will block the connection.
- Admin access to that SuiteCRM instance, so you can create an OAuth2 client.
- FlowSync is installed and active on your WordPress site.
- The SuiteCRM V8 REST API is available on your instance.
For developers: The V8 API needs its OAuth2 public and private keys generated on the server, with correct file ownership and permissions. This is the most common reason a connection fails on the first try.
Step 1: Create an OAuth2 client in SuiteCRM
In your SuiteCRM admin, go to Admin → OAuth2 Clients and Tokens and create a new client. SuiteCRM gives you a Client ID and a Client Secret. Copy both somewhere safe before you leave the page; the secret is only shown once.
You’ll pick one of two grant types when you connect in FlowSync, so create the matching client:
- Client Credentials is the simpler option. It needs only the Client ID and Secret. Use this unless you have a specific reason not to.
- Password also requires a SuiteCRM username and password. Use it if your setup needs sync activity tied to a specific SuiteCRM user account.
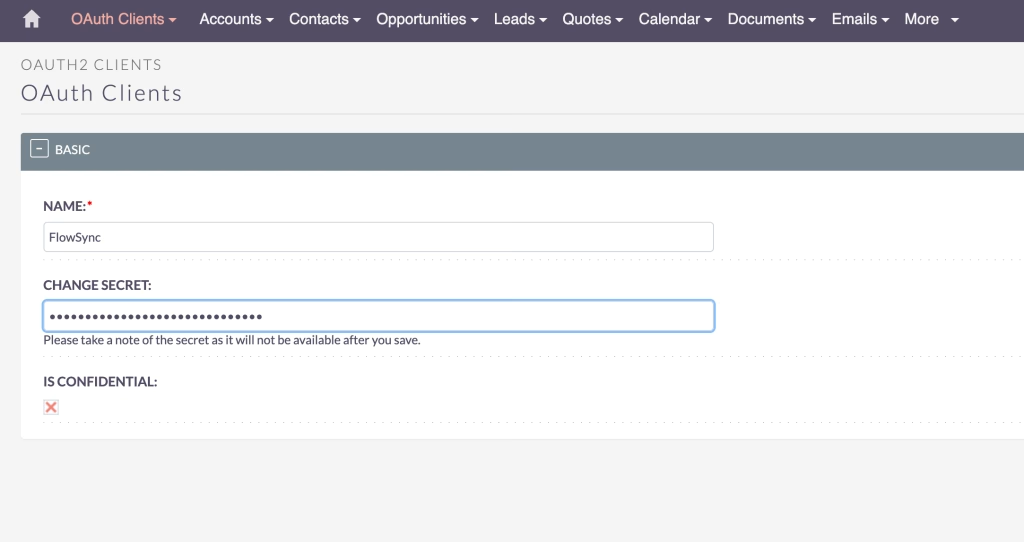
For developers: FlowSync mints tokens directly from the stored client credentials, with no browser authorize step. Client Credentials clients re-mint a token when the old one expires. Password clients use the refresh token when one is available and fall back to a fresh mint otherwise.
Step 2: Connect SuiteCRM in FlowSync
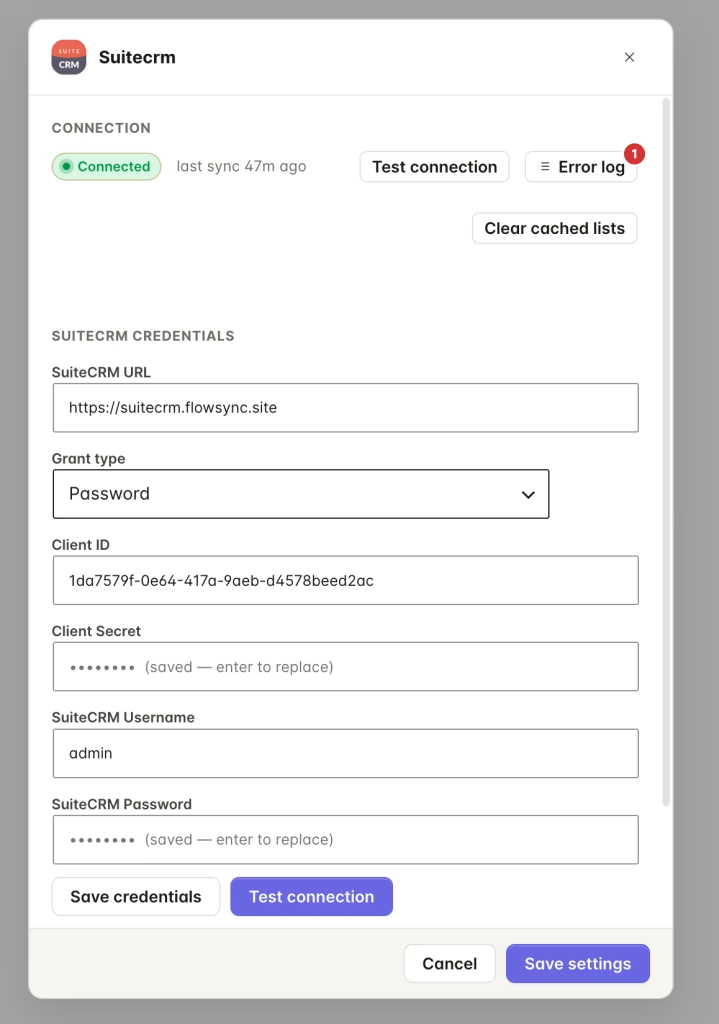
In WordPress, go to FlowSync → Integrations and open SuiteCRM. Fill in the form:
- SuiteCRM URL is the base address of your instance, for example
https://crm.example.com. A trailing slash is fine; FlowSync trims it. - Grant type is Client Credentials or Password, matching the client you created.
- Client ID and Client Secret from Step 1.
- Username and Password are only shown for the Password grant. Leave them out for Client Credentials.
Click Save. FlowSync requests a token from your instance and confirms the connection by reading your module list. If it works, the integration shows as connected.
For developers: FlowSync builds two URLs from the instance address:
{instance}/Api/access_tokenfor the token exchange and{instance}/Api/V8/for every API call. Credentials and tokens are stored encrypted in the FlowSync credential vault, never as plaintext in the options table. The connection check callsmeta/modulesand caches the result for five minutes, so reconnect if you want to re-test immediately after a server change.
Step 3: Add a SuiteCRM action to a workflow
Open a workflow (or create one) and add an action. FlowSync gives you two SuiteCRM actions:
- Sync to the SuiteCRM Module adds or updates a record. Pick the module, Contacts or Leads. FlowSync matches on the contact’s email. If a record with that email already exists, FlowSync updates it. If not, it creates a new one.
- Opt out in SuiteCRM marks a contact as opted out. SuiteCRM doesn’t have list or tag membership to remove someone from, so FlowSync never deletes the record. It sets the email opt-out flag on the matched record instead. If no record matches, the action does nothing and logs a success.
Only the Contacts and Leads modules are supported.
Step 4: Map your fields
By default, FlowSync maps the basics:
| WordPress | SuiteCRM |
|---|---|
email1 | |
| First name | first_name |
| Last name | last_name |
On the free plan, FlowSync syncs email, first name, and last name.
Pro unlocks the phone field plus any custom fields on the module. FlowSync reads the available fields straight from your instance, so any custom field you’ve added in SuiteCRM Studio shows up in the mapping dropdown automatically. Relationship, image, and file fields are left out, since they can’t be set with a plain value.
For developers: Custom fields are discovered from
meta/fields/{module}and cached. The base fields (email1,first_name,last_name,phone_work) and SuiteCRM system fields (id,date_entered,date_modified,deleted) are reserved and won’t appear as mappable custom fields. Date and datetime fields are surfaced as date inputs; everything mappable else is treated as text.
If something goes wrong
- The connection fails right after saving, or you see a “non-JSON body” error. This is a SuiteCRM server-side problem, not your credentials. Check that the V8 API is enabled and that its OAuth2 keys are generated with the right permissions, then reconnect.
- You get a 401 or token error. Check the Client ID and Secret. For the Password grant, also check the username and password. FlowSync retries once on a 401 by refreshing the token, so a persistent 401 points to bad credentials.
- The connection is rejected over the network. Confirm your instance is reachable over HTTPS with a valid certificate. FlowSync will not connect over plain HTTP or to an invalid certificate.
- Records aren’t updating the contact you expect. Matching is by primary email (
email1). If the SuiteCRM record stores the address in a different field, FlowSync won’t find it and will create a new record instead. - Check the sync log. Failed syncs are recorded with the exact error SuiteCRM returned, which usually points straight at the cause.