
Google Sheets lets you log workflow data, build reporting dashboards, and keep a running record of member activity — without a separate CRM. When a new member subscribes, an order completes, or a contact syncs, FlowSync can append a row to any sheet in your Google Drive.
Before you start
FlowSync connects to Google Sheets using your own Google Cloud credentials. This means you create a free Google Cloud project, generate an OAuth Client ID and Secret, and paste them into FlowSync. No data passes through FlowSync’s servers — the connection goes directly between your WordPress site and Google.
This takes about 10–15 minutes the first time. You will not need to do it again unless you rotate your credentials.
What you need:
- A Google account with access to Google Drive
- Admin access to your WordPress site
- FlowSync Pro active on your site
Why BYO credentials? Google restricts the
spreadsheetsscope for centralised OAuth brokers. Rather than limit what you can do, FlowSync uses your own Cloud project so you get full access with no third-party restrictions.
Step 1 — Create a Google Cloud project
Go to console.cloud.google.com and sign in with the Google account that owns the spreadsheets you want to write to.
- Click the project selector at the top of the page (it may say “Select a project” or show an existing project name)
- Click New Project
- Give it a name — “FlowSync” works fine — then click Create
- Make sure your new project is selected before continuing
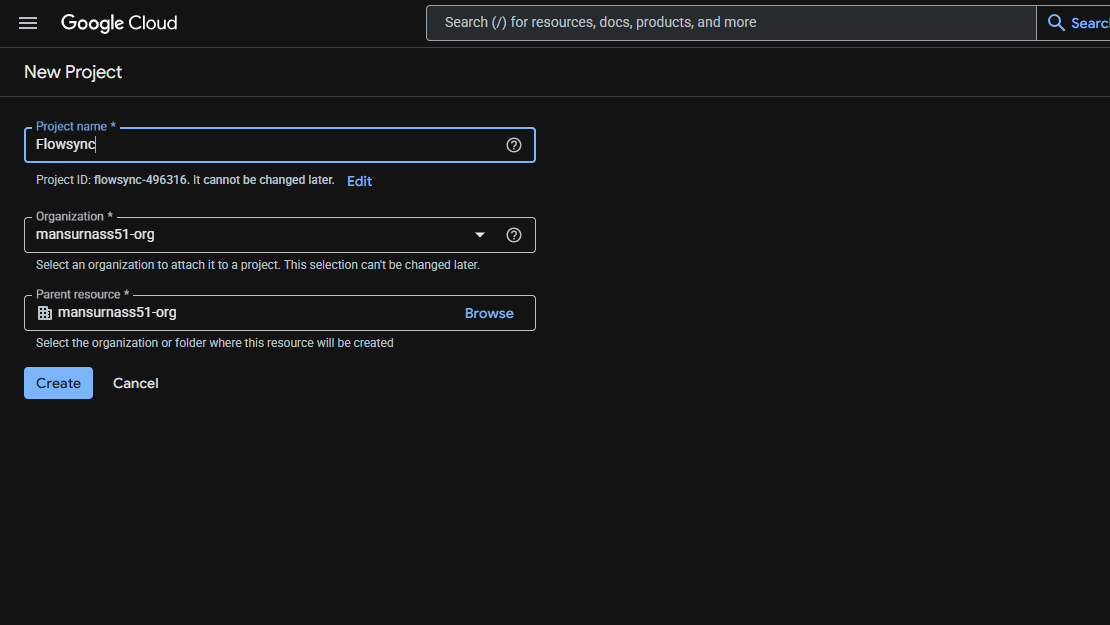
[Screenshot: Google Cloud Console — new project selector with project name field]
Developer note: The project name is internal only. It never appears in OAuth consent screens shown to your users.
Step 2 — Enable the required APIs
With your project selected:
- Go to APIs & Services → Library in the left sidebar
- Search for Google Sheets API and click Enable
- Go back to the library, search for Google Drive API and click Enable
Both APIs must be enabled. FlowSync uses Google Sheets to write rows and Google Drive to list your spreadsheets in the FlowSync settings panel.
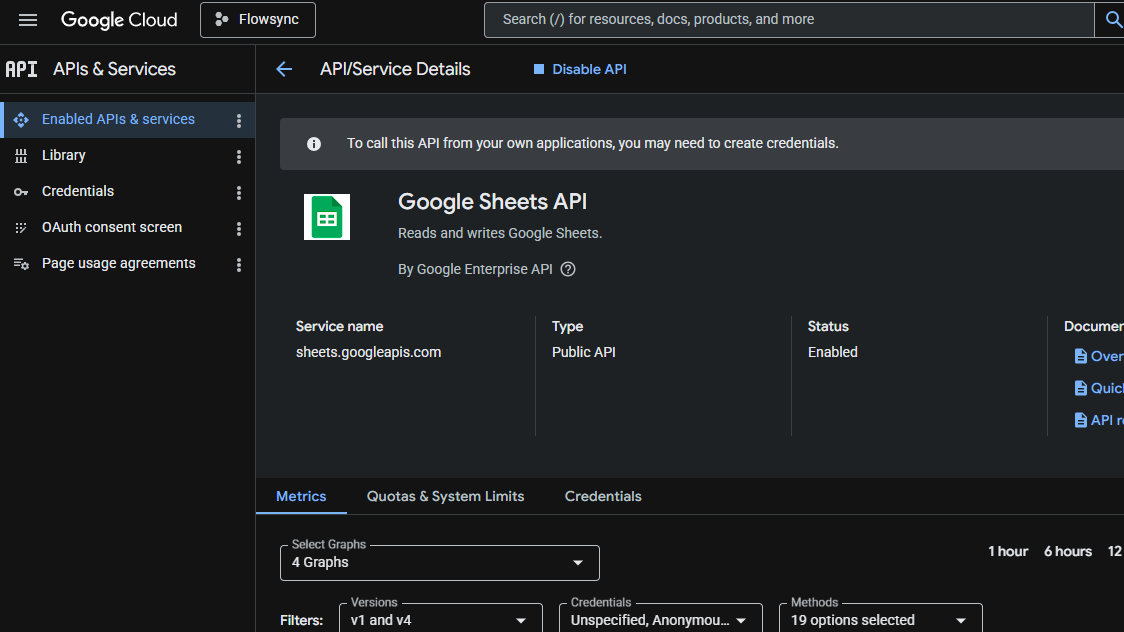
[Screenshot: Google API Library — Google Sheets API enabled confirmation screen]
Step 3 — Configure the OAuth consent screen
Before you can create credentials, Google requires you to configure what users will see when they authorise the connection.
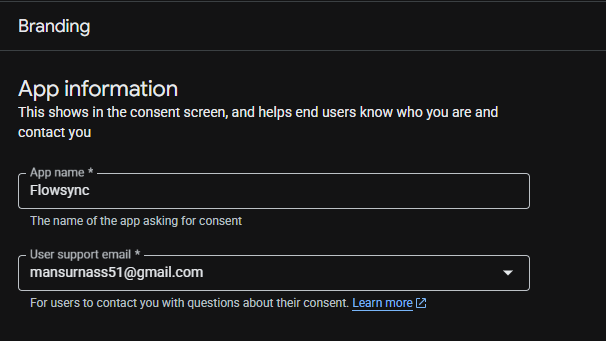
- Go to APIs & Services → OAuth consent screen
- Select External as the user type, then click Create
Fill in the required fields:
- App name: FlowSync (or your site name)
- User support email: your email address
- Developer contact information: your email address
Click Save and Continue through the Scopes and Test Users screens without adding anything — you will add yourself as a test user in a moment.
Step 4 — Publish the app
Still on the OAuth consent screen, click Publish App, then confirm when Google asks if you are sure.
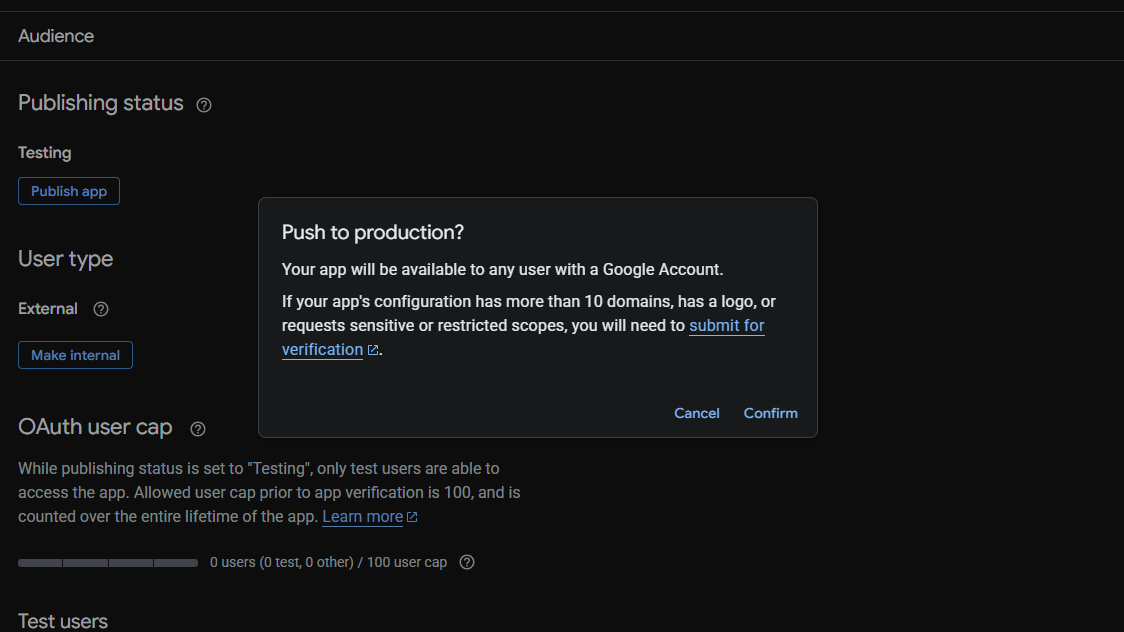
Your app status changes from Testing to In production. This does not mean Google has reviewed or verified it — it simply means the OAuth tokens your site generates will not expire after 7 days.
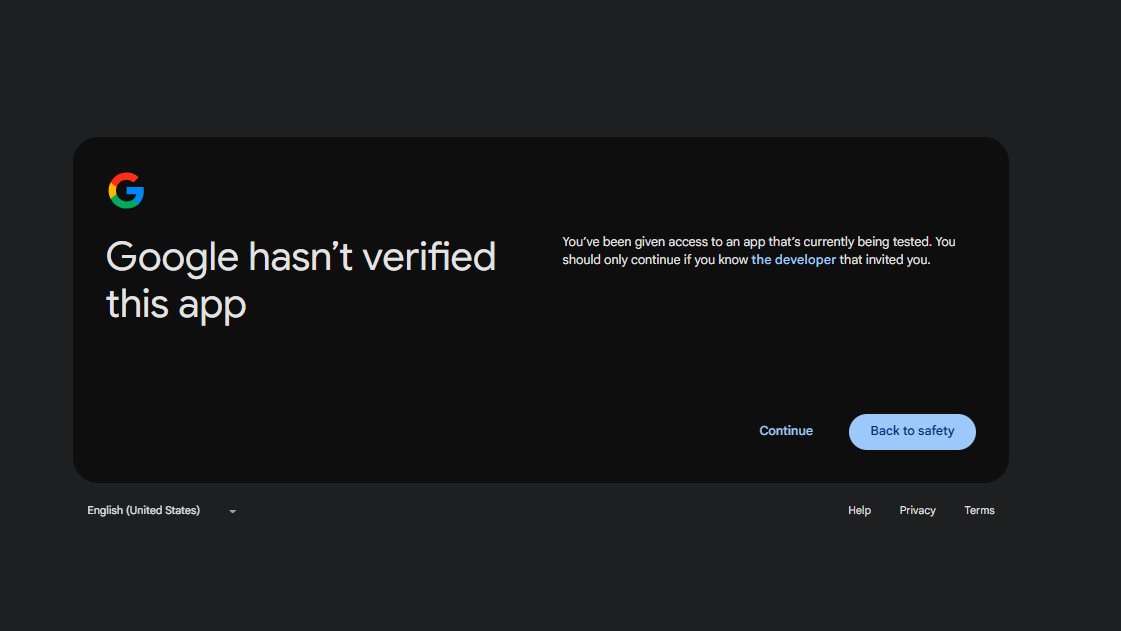
When you authorise the connection in Step 7, Google will show an “unverified app” warning. This is normal for a private Cloud project you own. Click Advanced → Go to [app name] to proceed past it.
Developer note: Publishing without verification gives persistent refresh tokens but keeps the “unverified app” interstitial on the consent screen. Since only the site owner authorises this connection once, the interstitial is a one-time inconvenience, not a user-facing problem. Verification is only required if you wanted to remove that warning — which is unnecessary here.
Step 5 — Create OAuth credentials
- Go to APIs & Services → Credentials
- Click Create Credentials → OAuth client ID
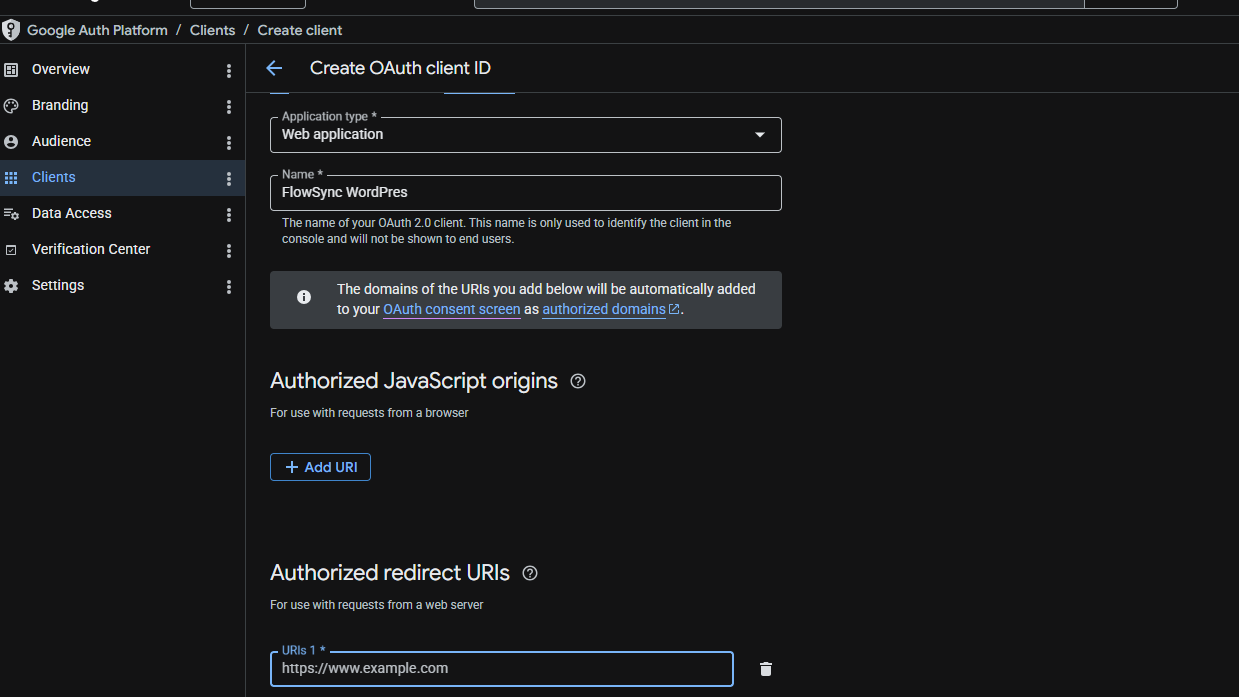
- Set Application type to Web application
- Give it a name — “FlowSync WordPress” is clear enough
Under Authorized redirect URIs, click Add URI and paste your redirect URI. You will find your exact redirect URI in FlowSync in the next step — come back here to paste it.
Step 5 — Find your redirect URI in FlowSync
- In your WordPress admin, go to FlowSync → Integrations
- Find Google Sheets in the CRM / Email Services tab and click Configure
- The panel shows your redirect URI — it looks like:
https://yoursite.com/wp-admin/admin.php?page=flowsync-integrations&fsauth=google-sheets
Copy this URI exactly and paste it into the Authorized redirect URIs field back in Google Cloud (Step 4), then click Save.
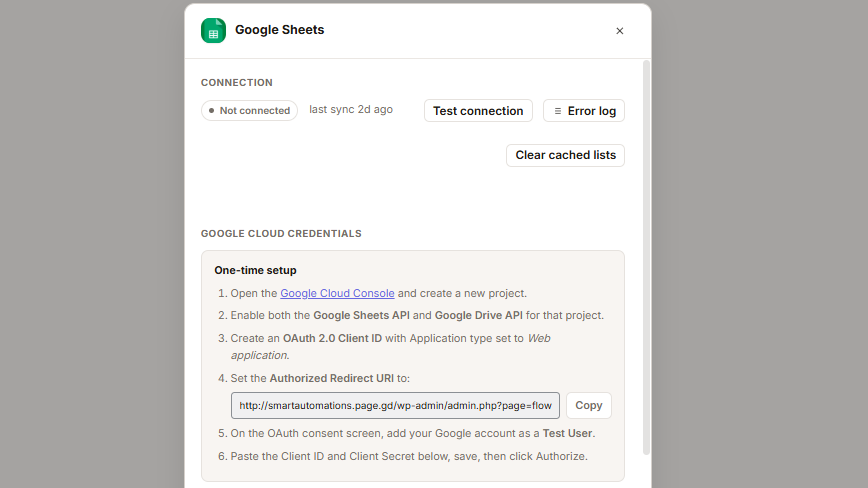
Developer note: The redirect URI must match character-for-character — including protocol (
https://), no trailing slash, and the exact query string. WordPress multisite installs should use the network admin URL if FlowSync is network-activated.
Step 6 — Copy your Client ID and Secret into FlowSync
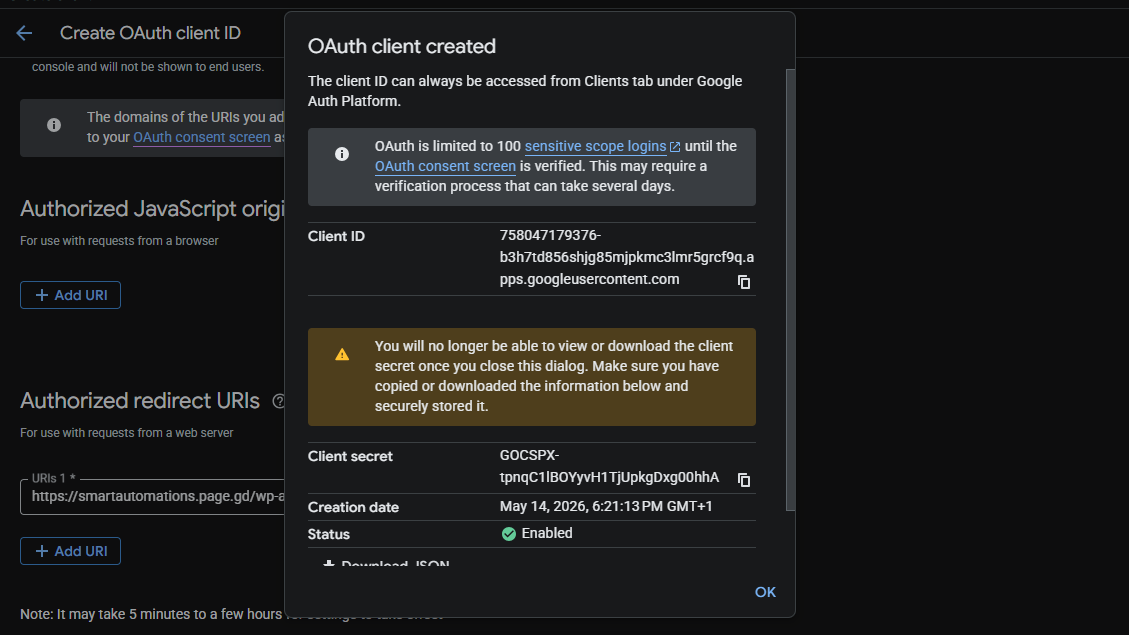
Back in Google Cloud, after saving your OAuth client:
- Click the download icon or open the credential you just created
- Copy the Client ID — a long string ending in
.apps.googleusercontent.com - Copy the Client Secret — a shorter alphanumeric string
In FlowSync:
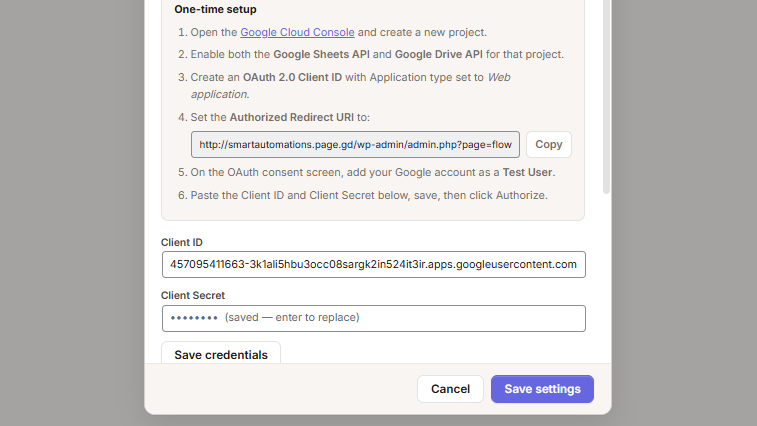
- Paste the Client ID into the Client ID field
- Paste the Client Secret into the Client Secret field
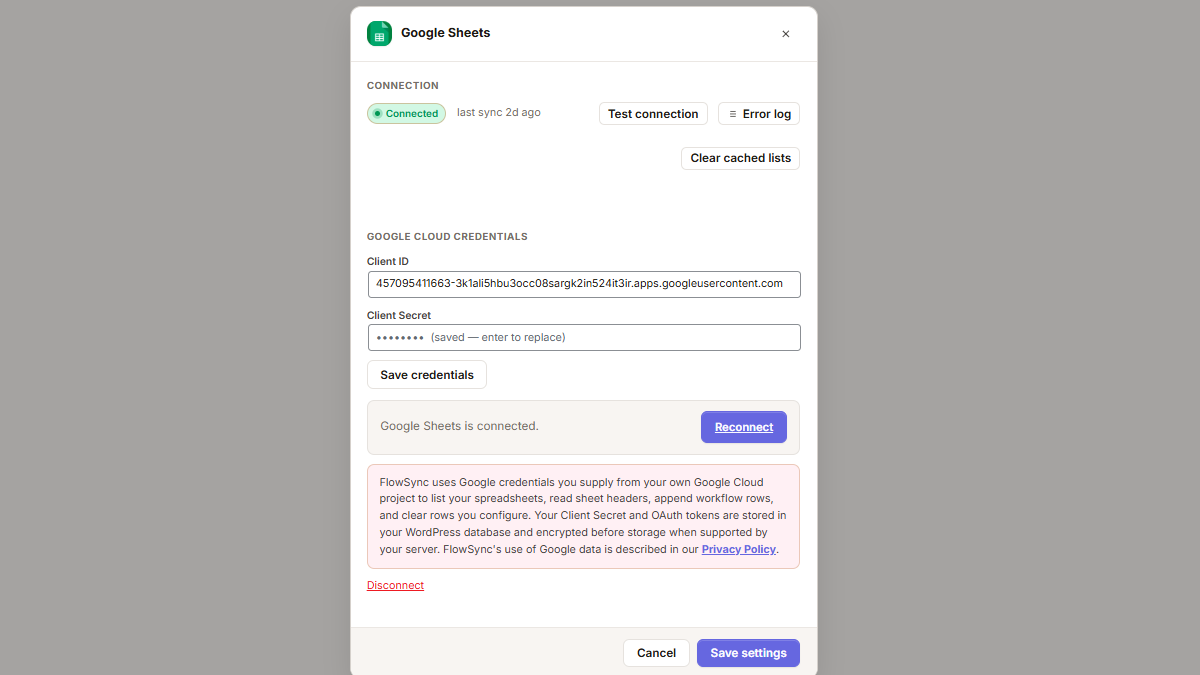
- Click Save credentials
Developer note: FlowSync encrypts both values at rest using
Credential_Vault(OpenSSL/sodium depending on server support). They are never stored in plaintext after the first save.
Step 7 — Authorise the connection
With your credentials saved, click Connect Google Sheets in the FlowSync configure modal.
You will be redirected to Google’s authorisation screen. Sign in with the same Google account you added as a test user in Step 3. Google will show a warning that the app is unverified — this is expected for a Testing-status app. Click Advanced → Go to [app name] to proceed.
Grant the requested permissions and you will be redirected back to your WordPress site. FlowSync will confirm the connection with a green “Connected” status.
Developer note: The authorisation flow exchanges the code for an
access_tokenandrefresh_tokenviaclass-google-oauth.php, which hitsoauth2.googleapis.comdirectly from your server. No FlowSync-hosted broker is involved. Tokens are stored inflowsync_integration_settings_google-sheetsand encrypted byCredential_Vault.
Using Google Sheets in workflows
With the integration connected, two actions are available in the workflow builder:
Append Row — adds a new row to a sheet each time the workflow runs for a user. Use this to log new member sign-ups, completed orders, or contact syncs.
Before using this action, make sure your spreadsheet has a header row in row 1 with the column names you plan to use — for example:
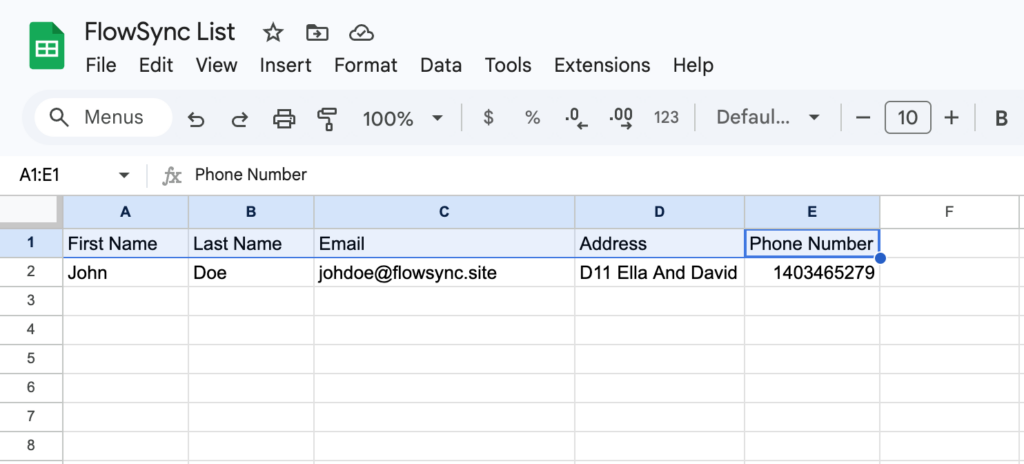
The column names are up to you. FlowSync maps its fields to these headers when you configure the action, so row 1 needs to exist before the first row is appended.
Clear Row — removes a row matching the contact’s email address. Use this when a subscription is cancelled or a contact is removed from a list.
To add either action to a workflow:
- Open a workflow in the FlowSync workflow builder
- In the Actions section, click Add Action
- Select Google Sheets from the action group
- Choose Append Row or Clear Row
- Select the target spreadsheet and sheet name
- Map the columns — each column in your sheet maps to a FlowSync field (user email, first name, membership plan, order total, etc.)
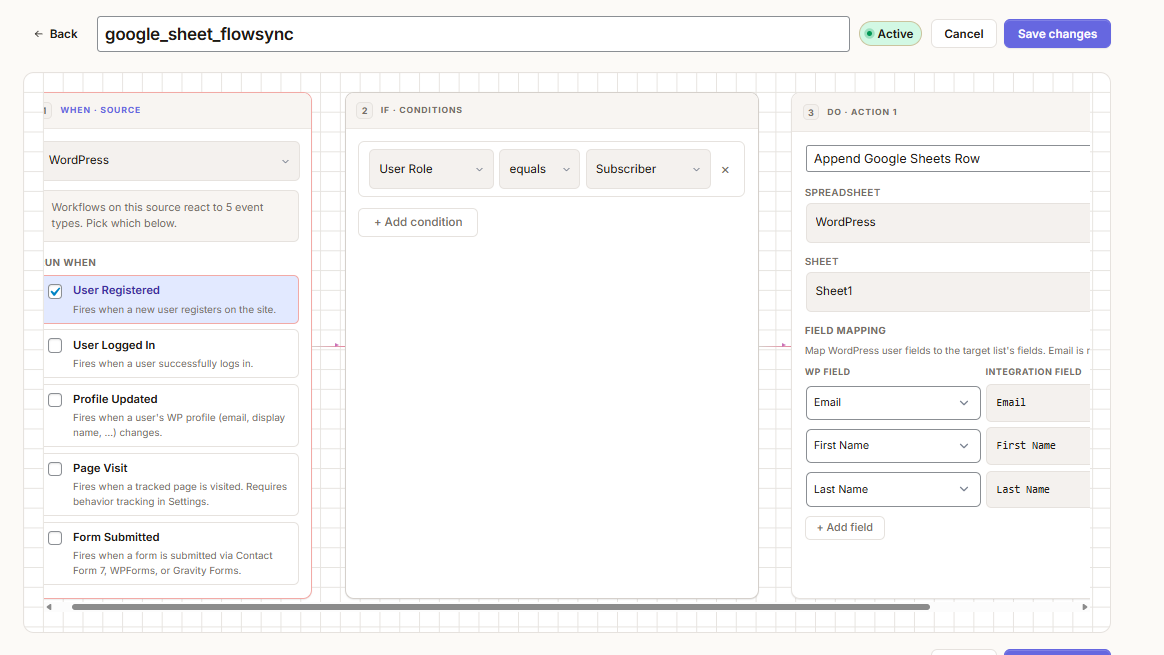
Column mapping works the same as CRM field mapping. Free plan users can map email, first name, and last name. Pro unlocks all available fields including membership plan, order data, and custom user meta.
Troubleshooting
“Redirect URI mismatch” error during authorisation The redirect URI in Google Cloud does not exactly match your site URL. Go back to APIs & Services → Credentials, open your OAuth client, and confirm the URI matches what FlowSync shows — character for character, including https:// and no trailing slash.
“Connected” status disappears after a few days Your access token has expired. This happens in Testing mode because Google limits token lifetime to 7 days. Click Connect Google Sheets again to re-authorise.
No spreadsheets appear in the dropdown The Google Drive API may not be enabled, or your Google account has no spreadsheets. Check that both the Sheets API and Drive API are enabled in your Cloud project (Step 2).
Developer note: FlowSync caches the spreadsheet list for 10 minutes. If you created a new spreadsheet and it does not appear, click Clear cached lists button on the Integrations page to flush the cache and reload.